Below are instructions for how to use Screen Connect from a support role. Screen Connect is a tool used to connect to someone else's computer and view their screen and assist them with an issue. Please note, that Screen Connect rarely works on mobile devices, so the user MUST be at their computer for this to work effectively. First, you will want to go to myocu.com and select "Screen Connect".

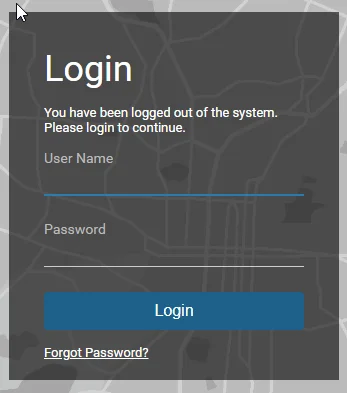
Once you do this, you will be taken to the Screen Connect homepage. Click on the "Login" button on the top right corner.

You will then be taken to the login screen where you will enter your OCU email address and password to log into your account. Fill this out and click the "Login" button.
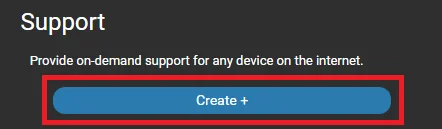
Once logged in, you can create a new session by clicking the "Create +" button.
Once the session has been created, you can then name it with either your name or the name of the person you are assisting. This is just for reference, so the specific name is not important. You can then inform the user to enter the join code (you can either use the default one or type a custom code) on the Screen Connect homepage and click the arrow next to where they entered the code. This will download the program to their computer. Once the download is complete they MUST open it manually as it does not open automatically. They may need to also allow the program to make changes to their computer.

Once you have walked the user through the Screen Connect process, it will show up on the session as "Guest clicked join". When the user opens the download, you will both be connected to the session. When you are both connected, the bars shown below will both turn green.

Once, you are done with the session, you can close the program and this will disconnect you from the user's computer.